The origami hummingbird is a delicate and intricate paper craft inspired by the agility of the real bird, offering a creative challenge for both beginners and experts.
Overview of the Design
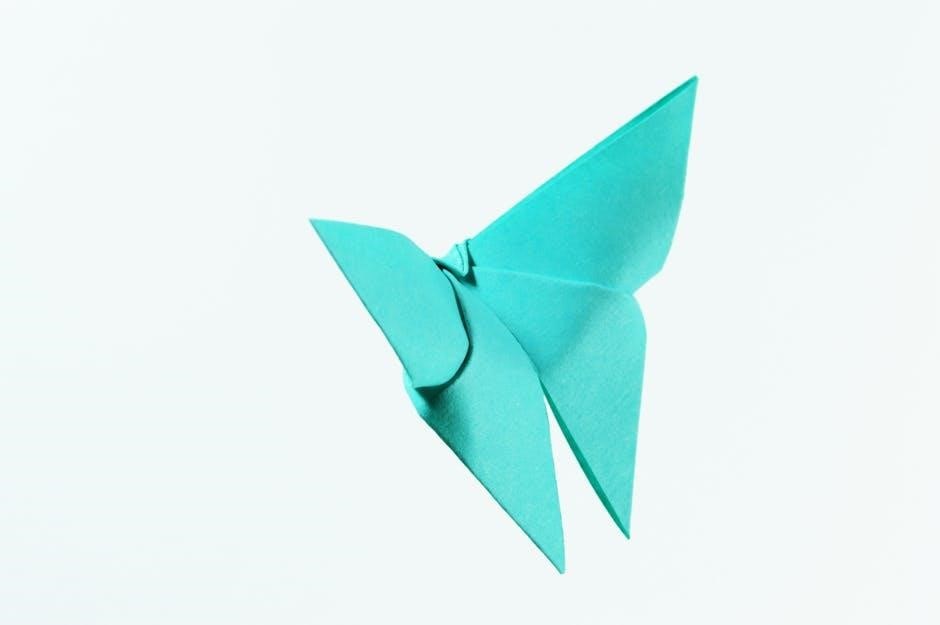
The origami hummingbird is a captivating model that mimics the grace and agility of its natural counterpart. Designed to be both visually striking and intricately detailed, it typically begins with a square sheet of paper. The model incorporates layered folding techniques to create the bird’s slender body, delicate wings, and distinctive beak. Inspired by traditional origami styles, this design often draws from the simplicity of the origami crane but adds unique elements to capture the hummingbird’s essence. The result is a charming, three-dimensional piece that symbolizes agility and beauty. While it may appear complex, the design is accessible to intermediate folders and offers a rewarding creative experience.
Historical Context and Inspiration
Origami, the art of paper folding, has deep roots in Japanese culture, dating back centuries. The hummingbird design, while modern, draws inspiration from traditional origami birds like the crane, symbolizing grace and agility. This model captures the essence of the hummingbird’s vibrant beauty and dynamic movement. Historically, origami birds often carry symbolic meanings, such as longevity or peace, and the hummingbird extends this tradition by representing energy and resilience. Inspired by nature’s intricacies, the design reflects the artist’s interpretation of the bird’s unique features, blending simplicity with complexity. Over time, origami enthusiasts have refined the design, making it accessible while preserving its elegance. This piece embodies the fusion of cultural heritage and creative innovation.

Materials and Tools Needed
To create an origami hummingbird, you’ll need a square sheet of paper (preferably kami or washi) and basic tools like a flat surface and a bone folder for sharp creases.
Paper Selection and Size
Choosing the right paper is crucial for crafting an origami hummingbird. Opt for high-quality kami or washi paper, as these are durable and ideal for intricate folds. Select a square sheet, typically 6×6 inches, to ensure proper proportions. For beginners, a larger sheet (8×8 inches) can simplify the process, while experienced folders might prefer smaller sizes for detail. The paper should have a smooth texture and a subtle color on one side to enhance the bird’s appearance. Avoid thick or patterned papers, as they can complicate folding. Square paper is essential for traditional origami techniques, so refrain from using rectangular sheets. Proper paper selection ensures a polished and symmetrical hummingbird model.
Essential Origami Tools
To create an origami hummingbird, you’ll need a few essential tools to ensure precision and ease. A bone folder is crucial for creating sharp, defined creases, while a cutting mat or other protective surface prevents damage to your work area. Tweezers can assist with intricate folds and adjustments, especially for delicate wing details. A ruler or measuring tape is helpful for ensuring accurate paper sizing and alignment. Additionally, a pencil can be used to mark folds or guide lines, though care should be taken to erase them later. Optional tools include a sharp craft knife for trimming paper to size and a spray bottle to slightly dampen the paper, making it more pliable for complex folds. These tools enhance your folding experience and contribute to a polished final result.
Step-by-Step Instructions
Follow the step-by-step guide to craft an origami hummingbird. Begin with the paper preparation, then fold and shape the body, wings, and tail. Refine details for a lifelike appearance.
Step 1: Preparing the Paper
To begin, select a square sheet of origami paper, ideally colored on one side for a vibrant finish. Place the paper on a flat surface with the colored side facing up. Fold the bottom corner to the top corner diagonally, creating a sharp crease, then unfold it. This step helps establish the central fold line. Next, rotate the paper so the folded edge aligns horizontally. Ensure the paper is centered and smooth out any wrinkles. For precision, use a ruler to reinforce the crease if needed. This preparation sets the foundation for the subsequent folds, ensuring symmetry and accuracy in the hummingbird’s design. Proper alignment is crucial for achieving the desired shape.
Step 2: The Basic Fold
Begin by folding the top right corner of the paper diagonally to the center line, ensuring the edge aligns neatly. Repeat this step with the top left corner, creating a symmetrical shape. Next, fold the top and bottom edges inward toward the center line, forming a narrower diamond shape. Now, fold the top half of the paper downward, aligning the top edge with the bottom edge. This creates a compact triangle. Flip the paper over and repeat the fold on the other side to maintain symmetry. Use a ruler to reinforce the creases for sharp folds. This foundational step establishes the hummingbird’s body structure, setting the stage for more detailed folds. Precision and patience are key to achieving the desired shape.
Step 3: Forming the Hummingbird’s Body
To form the hummingbird’s body, fold the top triangle downward along the center line, creating the neck and head. Ensure the fold is crisp and symmetrical. Next, take the bottom half of the paper and fold it upward, aligning the edges to form the tail. Gently press to secure the shape. Now, fold the sides of the body inward, angling them slightly to create the illusion of wings. Repeat this step on the opposite side for symmetry. Finally, fold the tail downward, tucking it under the body to complete the structure. Use your fingers to shape the body for a natural, rounded appearance. This step requires patience to ensure all folds align properly, forming the iconic hummingbird silhouette.
Step 4: Finishing Touches
Once the body is formed, refine the tail by folding it downward and tucking it under the body for a balanced look. Adjust the wings by gently pulling them outward to create a natural, spread appearance. To add detail, fold small triangles at the ends of the tail for a feathered effect. For the head, fold a tiny triangle upward to form the beak. Use a toothpick or small tool to create eyes by poking holes and filling them with markers. Finally, inspect the model for any uneven edges and smooth them out. Handle the paper gently to avoid creases. These finishing touches bring the hummingbird to life, capturing its elegance and grace. Your origami hummingbird is now complete and ready to display.
Useful Tips and Tricks
Use a ruler to create sharp creases for precise folds. Handle the paper gently to avoid tears. Adjust wing angles for balance and symmetry.
Common Mistakes to Avoid
One common mistake is applying too much pressure, which can tear the paper. Ensure folds are precise to maintain the model’s integrity. Avoid over-folding, as it can distort the shape. Keeping the creases sharp is essential for a clean finish. If a step feels unclear, revisiting it helps prevent errors. Rushing through folds can lead to improper alignment, so patience is key. Handling the delicate parts gently prevents accidental tears. Correcting mistakes early avoids major issues later. These tips help create a flawless origami hummingbird.
Enhancing the Design with Details
To make your origami hummingbird more lifelike, add subtle details like a small beak or eyes using a marker. Feather textures can be drawn or folded lightly. For vibrancy, use colored paper or paint. Adding a tiny tail or legs, crafted from wire or extra paper, enhances realism. Experiment with layering to create depth in the wings. To personalize, attach a small loop of string for hanging. These touches elevate the design without complicating the folds. Creativity is key, so feel free to innovate while staying true to the model’s essence.
Cultural Significance of the Hummingbird
The hummingbird symbolizes agility, beauty, and inspiration in many cultures, often representing positivity, vitality, and connection to nature. Its grace inspires origami artists to recreate its form.

Symbols and Meanings in Origami
In origami, the hummingbird is a symbol of agility and beauty, reflecting the delicate balance of nature. The bird often represents positivity, vitality, and resilience. Origami itself carries deep cultural significance, embodying patience, precision, and the transformation of simple materials into meaningful art. The hummingbird’s intricate design symbolizes the connection between creator and creation, while its wings remind us of the fleeting yet beautiful moments in life. Through origami, the hummingbird becomes more than just a paper figure—it’s a representation of hope and the joy found in creating something with one’s own hands. This art form bridges tradition and modern creativity.
Troubleshooting and Adjustments
When crafting an origami hummingbird, common issues include misaligned wings or uneven folds. To fix this, ensure precise creases and symmetrical folding. If the wings don’t align, gently adjust the angles while the paper is partially folded. For a more natural look, tweak the wing positions slightly. If the body appears flat, reinforce the folds for better dimension. Practice makes perfect, so don’t hesitate to experiment and refine your technique. Adjustments can be made at any step, even after completing the model. Patience and attention to detail will help achieve a lifelike and graceful origami hummingbird.